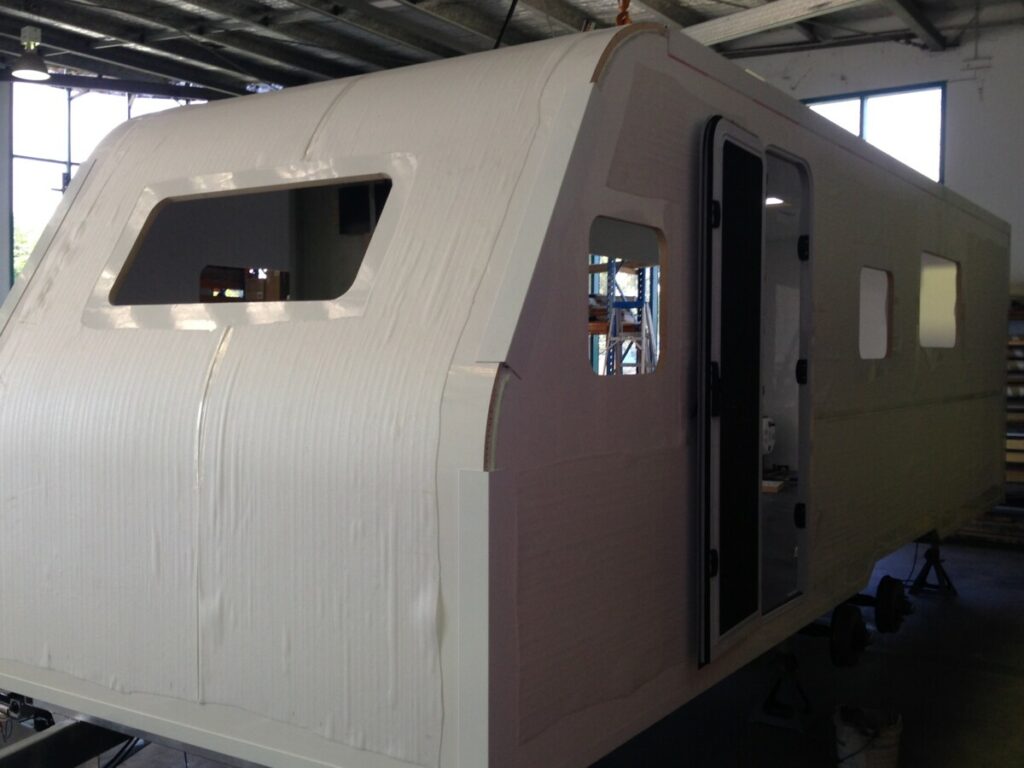
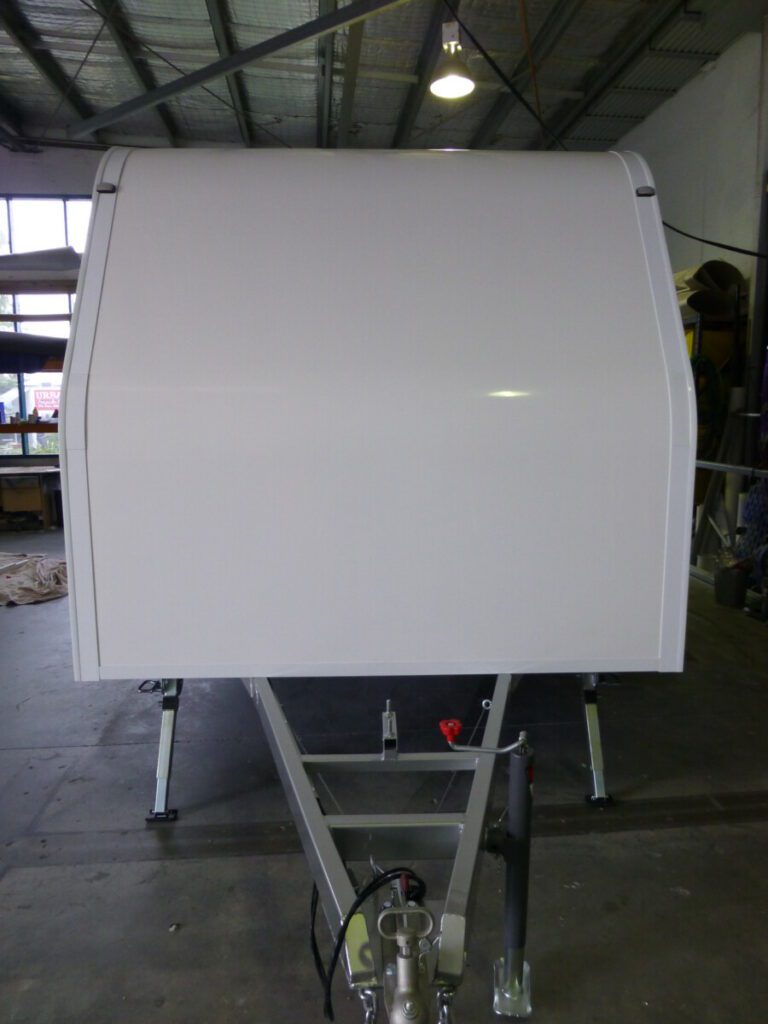
Using a single panel for the front wall and the roof has a number of benefits:
- A more aerodynamic front shape will save fuel as well as look more stylish
- There is no join between the roof and the front wall panel
- The more professional ‘look’ will enhance the resale value of your project
Design considerations:
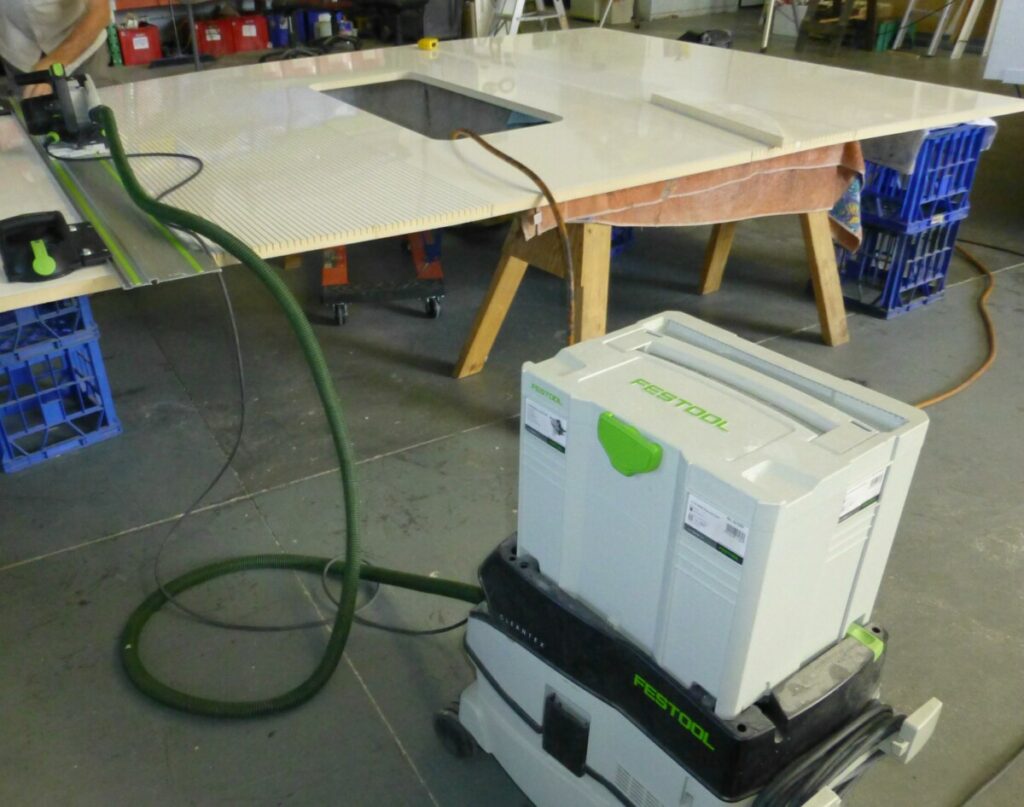
- Unlike aluminium sheet a gel coat skin cannot be ‘folded’ so we need to roll it round a curve and you need to select a radius that will not fracture the remaining gel coat skin – see the next point. In our builds with hand laid skins – as in Panel Kit A – we only recommend a radius of 500 mm though some customers go tighter at 400 mm. Panel Kit C uses Lamilux 1.9 mm which can be rolled with a radius of 300-400 mm.
- To facilitate the panel to ‘bend’ we have to cut slots in the inside skin – a process known as ‘kerfing’. The depth of these cuts and the distance between them can vary but as a guide it is wise to cut no deeper than 50% of the thickness of the panel to leave plenty of core to support the outer skin. With a 3mm aluminium blade a cut every 12-15 mm should suffice depending on the radius you are requiring.The best advice is to use a door or window cut-out from your panel kit to do a test run – cut your slots as you propose and check it rolls easily at the radius you propose. When at that radius the slots on the inside should just touch each other.
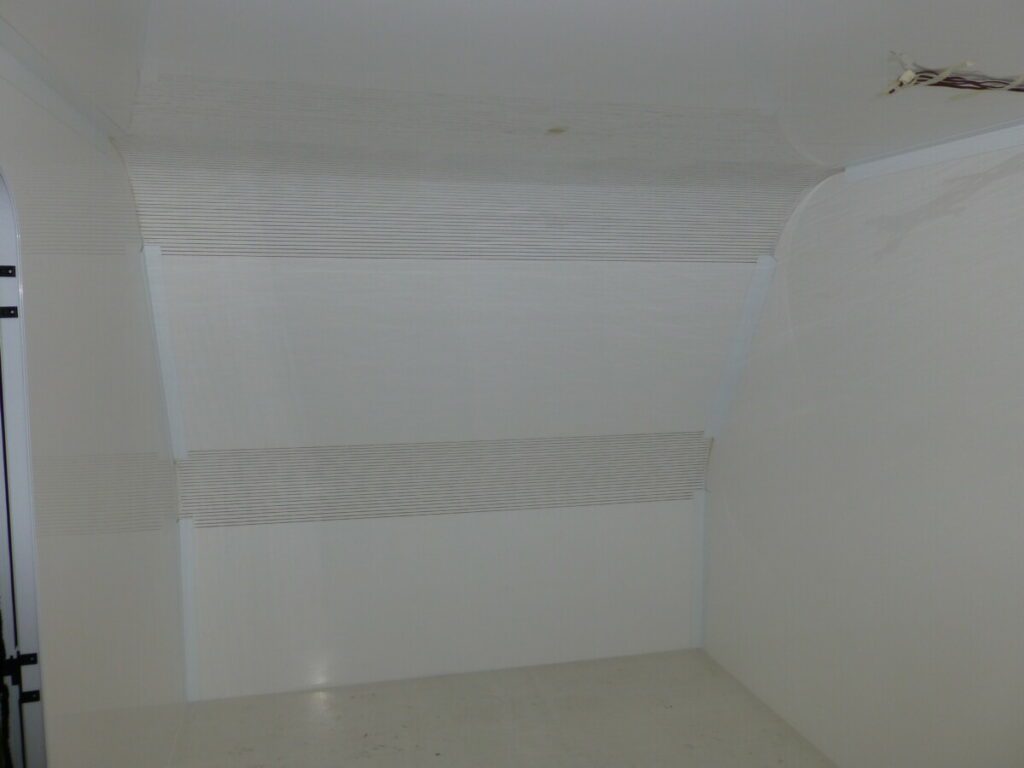
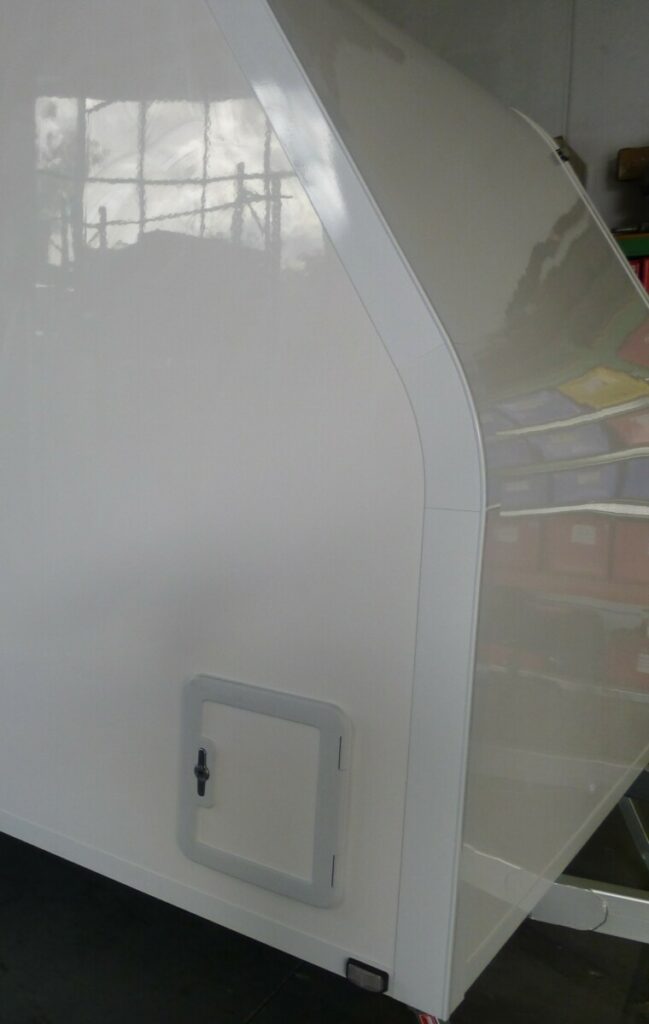
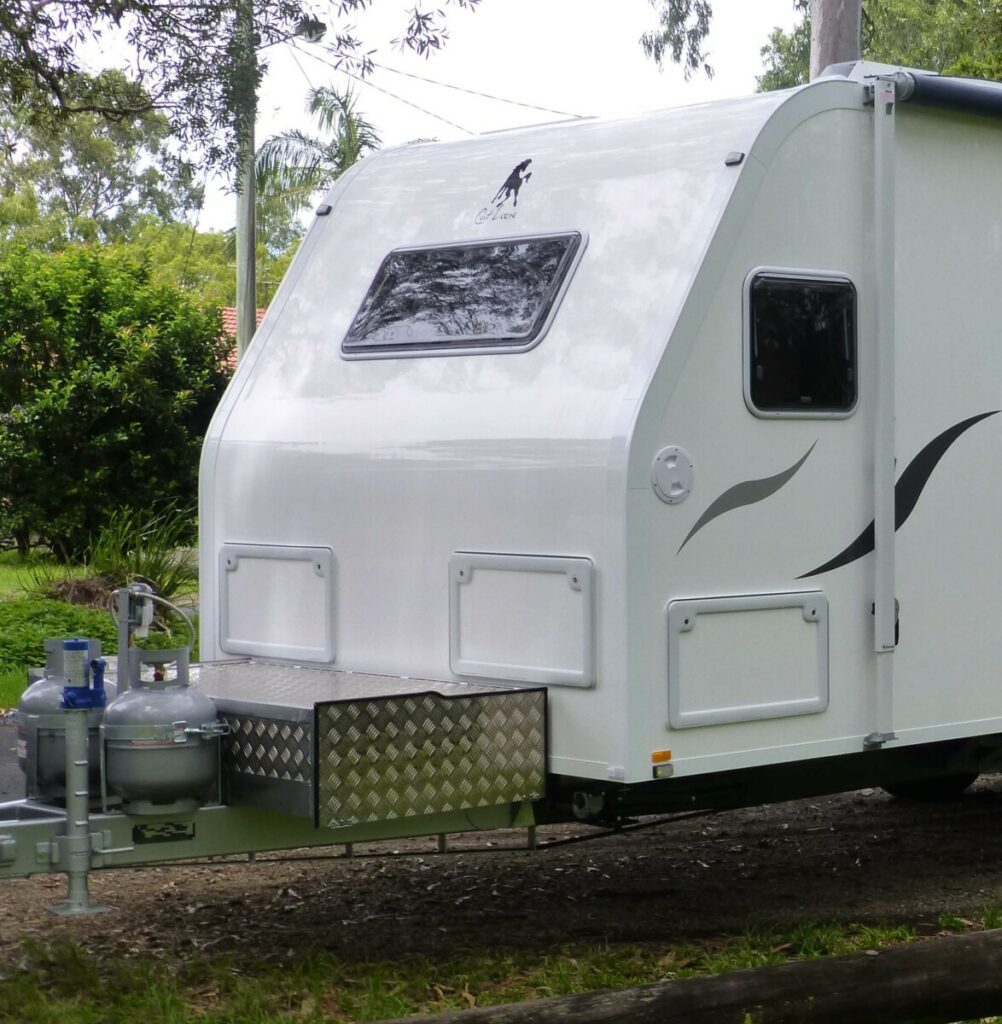
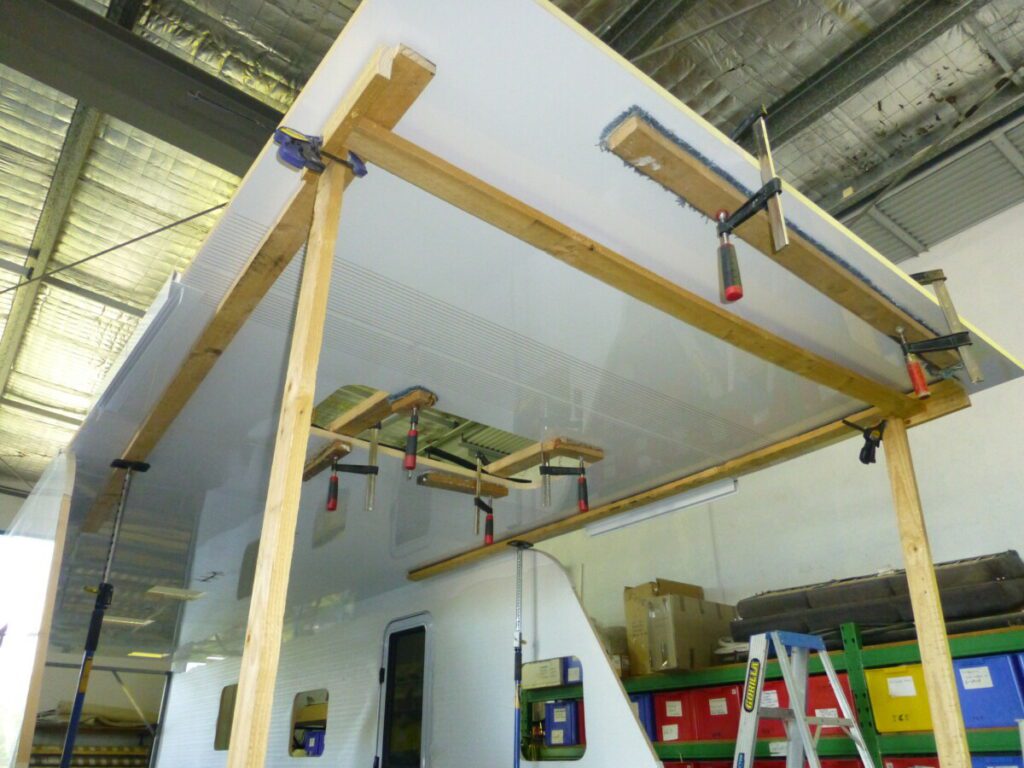
- The rolled front shape will usually involves a total radius section of 90 degrees – from the vertical front panel to the horizontal roof – and this may be achieved in 2 or 3 sections depending on your preferred shape. The image above shows 2 sections with the angled panel at approx 30 degrees to the vertical. Also note the 2 areas of slots inside the van below.
- Once the rolled roof panel has been assembled you will need a section of ‘GRP skin only’ to cover the inside slots and return the strength to rolled panel. In some designs you may be able to locate the extra skin ‘edge’ inside a cabinet so it is not seen.
- Another point to consider is the physical size of the rolled roof panel and how you are to get it transported from the manufacturer. In standard height vans this rolled roof panel can be 1.8 m longer than the wall panels
- And whether you cut the slots at home or get the panel manufacturer to do it also need some thought. Once the slots are cut the panel must be handled with extreme care as there is only one skin holding it together. Our advice is to cut the slots at home just before your assemble the roof panel – so all the earlier handling is done with 2 skins in place.
- Another tip is to cut the slots 30-50 mm past each edge of the radius section as this allows the roof panel to fit to the shape better without any imperfections on the outside.
Installing the Panel Trim or Panel Joiners you choose.
How this is done will depend on how you intend to join the panels together – either by using the rebate method or using the DIY panel joiners.
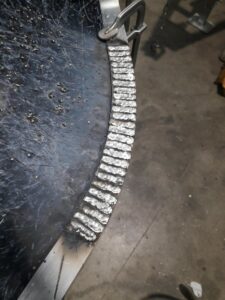
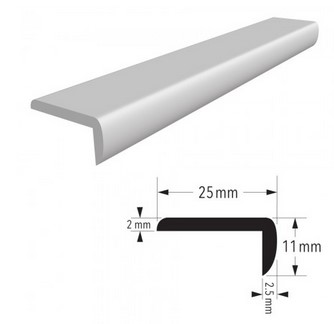
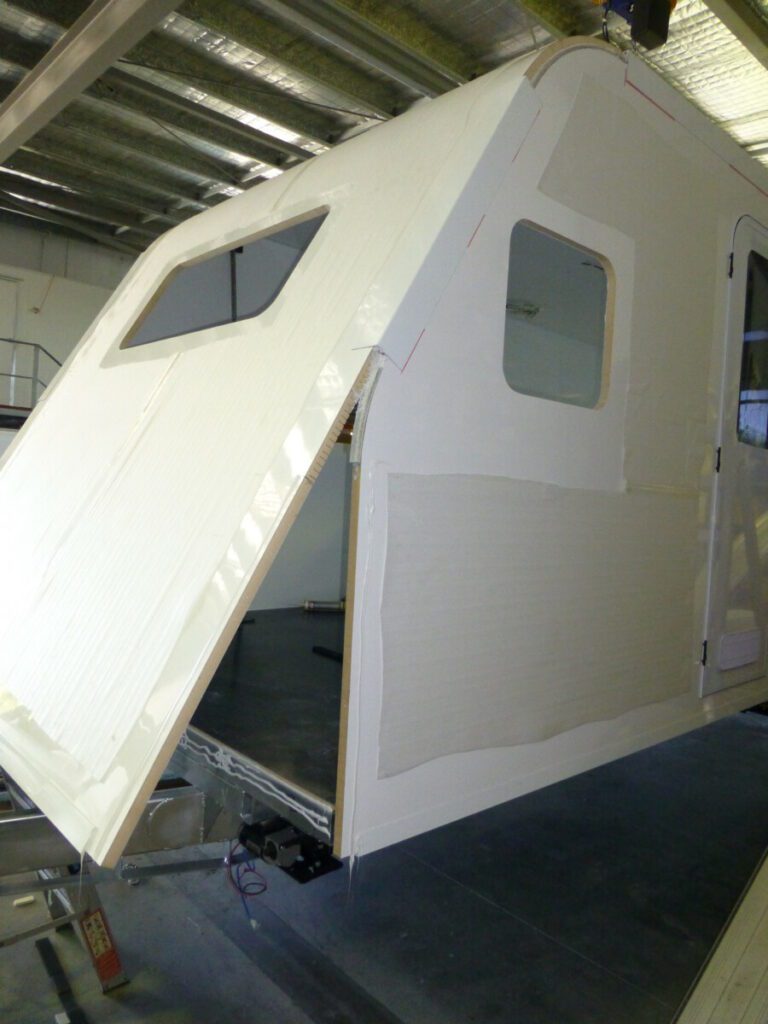
For the rebate system most customers use a white aluminium angle on the interior (say 25 x 25 ) and exterior of the join (say 50 x 50 ) to make it very robust. Whilst such angle cannot be rolled it can be cut carefully and rewelded to create the shape you need – see image.
Where customers are using the DIY Panel Joiners these joiners are used for the straight sections and we need to make a rolled roof trim kit to finish the radius sections. Note that there will be a gap of 11 mm between the roof panel edge and sidewall edge in each radius section – pack this tightly with a strip of foam core and adhesive
Each trim kit will consist of:
- Aluminium plates for external radius – 90 mm deep – to cover over 90 degrees
- Aluminium rolled plates for external radius – 88 mm wide – to cover over 90 degrees
- Aluminium plates for internal radius – 51 mm deep – to cover over 90 degrees
- Aluminium rolled plates for internal radius – 50mm wide – to cover over 90 degrees
- lengths of final cope mold trim- from the bottom of the front to paste the last radius section
Use of 2 mm aluminium plate is ideal for the above and if each individual item is cut to fit before it is powder coated the joins are barely visible. The cope mold trim is the final part to finish the job from top to bottom.

Calculating the length of the rolled roof panel will depend on whether you are using DIY panel joiners or using the rebate method to join the panels.
IMPORTANT NOTE – If you are using panel joiners as per the image below – please note
- There is an 11 mm gap between the edge of the sidewall and the underside skin of the roof panel
- so if the roof panel is 29 mm thick
- The Length of the rolled roof panel is determined by it’s upper skin which therefore rolls round a radius of R+40mm – where R is the radius of the curve on the sidewall
If you are using the rebate method and your rebate is the same depth as the thickness of the roof panel then you will use R mm to calculate the length of the roof panel where R is the radius of the curve on the sidewall