
This article is here to help you decide some of the design features you may want to include in your panel kit and to share with you some of the options that are available.
It should be read in conjunction with a previous article which helps you specify the details of your panel kit ‘How to design my Composite Panel Kit’ so that you can submit your design to the office for a quote
In my panel design is there a limit to the number of cut-outs and location of cut-outs?
There are no golden rules here and no guarantee that what works for one project will work for another but here are a few pointers.
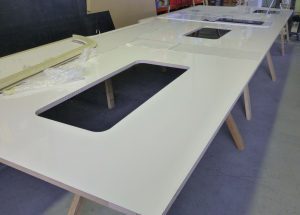
As a guide any cut-out closer than 200 mm to the edge of the panel will need some consideration and large openings like food van hatch windows do need insertions around the apertures to support the panel.
The solution also depends on other factors such as:
- What is your method of joining the panels together? The Aluminium DIY panel joiners add significant strength to the panel edges if you have cut-outs close to the panel edge
- What is the application – Off-Road vehicles will get more rugged treatment than an on-road caravan
- What skin thickness are you selecting on your panels – 2mm skins are stronger than 1.6mm skins
- How feasible is it? If you want a locker door at floor level then you have little choice, the same goes for the entrance door cut-out
Our advice is to design your panel drawings to the best of your knowledge and the panel supplier will usually go through them with you and suggest any changes or improvements that may be possible.
How do I run wiring and plumbing inside the Composite Panels?
As a general guide we would recommend
- you do not run plumbing inside any panels
- you only use insertions in the panels where they are absolutely necessary
- you can use insertions or a slot cut in the core for electric cables.
Plumbing in the form of John Guest 12mm piping is usually run underneath the floor along the inside of the chassis rails. Using elbows or T’s the pipe can be installed through the floor directly below the appliance that it is servicing. There is usually no need to go inside the panels.
In your wiring plan consider ways to avoid wiring inside the panels. Many switches can be installed at the end or side of overhead cabinets etc so the cables run in trunking at the back of the cabinet are are readily accessible at all times. Cables can also run in trunking down the back or wardrobes, fridge cabinets etc to get to the floor level so they are not visible. You may want to take them through the floor just inside the chassis rail to keep it all neat underneath.
If you need to get a cable say 200 mm through the core from the edge of the panel eg to a switch or light then note that with care you can hole-saw the inner skin off at the location and then use a slightly heated bar or rod to form a round channel to the hole-saw cut from the edge.
Where necessary the larger insertions such as Pultusions or Aluminium RHS tend to be used where extra strength is required or you are running 240 volt cables – such as the AC unit on the caravan roof.
The smaller insertions are generally used for 12 volt wiring only.
The simpler the panel design the more you can make those decisions later and the cheaper the panel.
Is the cnc cutting of the panels included in the cost?
All composite panels are made to order using core material and fibreglass skins that are larger than your panel sizes. The cutting of the perimeter of the panel is included in the cost of the panel.
If you require further cnc cutting of the panel – eg window and door cut-outs – this will normally be priced as a separate item called ‘Profile cutting’ and is calculated per metre. Where possible we will try and also include this in the cost of the panels.
What do you mean by an Insertion?
When we refer to a panel insertion we are referring to a product that is between the 2 skins of the composite panel. It may be a conduit for cables or a product for adding strength or improving screw purchase. The panel core has to be cut to allow for the insertion and it has to be installed as part of the manufacturing process. The choice of insertions will depend on the type of Panel Kit you select. Click here for more info on Panel Insertions.
What is the difference between using Aluminium or the fibreglass pultrusion as Insertions in the composite panels?
Fibreglass pultrusions are generally more expensive to buy and install – and have the benefit of not transmitting heat (or cold). With aluminium insertions it can act as a cold bridge and cause slight condensation on the inside of the van if the ventilation is poor.
Fibreglass is likely to be stronger than aluminium and both products act as a conduit for running cables through the composite panel. Aluminium will provide better screw purchase though you can use special ‘banana’ rivets if you need to attach items into a pultrusion.
Aluminium inserts cannot be installed using the Hot-Melt process as used in the production of Panel Kit B . It requires the vacuum bagging technique and can be installed in Panel Kits A and C.
Pultrusions are available as either 50x25mm or 38x25mm (depending on supplier) whereas Alumiuium is available in a larger range of sizes from 25x25mm to 50 x 25mm.
Do you need pultrusions for attaching an awning? I intend to attach an awning similar to the Dometic PerfectWall which is fastened to the caravan at the top.
If you are using the aluminium DIY joiner system to join the composite panels together, there will be one length along the top of the wall panel and you can attach the awning to this joiner. If your awning has legs the base of the legs can also be attached to the floor joiner running along the bottom of the side wall panel.
If you are using another method to join the panels together, then we suggest you will need panel insertions at the attachment points strong enough to support the extended awning.
How do you join panels at an angle other than 90 degrees?
Many projects involve panels being joined at different angles – for example where the vertical front joins a panel at an angle or where you have a rake in the rear wall. If you are using DIY Panel Joiners to join the other panels you will need to mitre carefully the aluminium panel joiner to the angle required. The process below can be used to trim the join between the panels for most angles.
1. Firstly ensure the panels are cut to the right size which is the longer dimension. Now you will need to cut the inside skin and mitre the ends so they fit reasonably tight along the edge of the join – both on the inside and outside skins. Always try a sample to check how far in to cut the inside skin – and then using a sharp knife you will be able to cut the mitre to the correct angle.
2. Cut a strip of 2mm aluminium say 70-80 mm wide off a 2400 long sheet and fold it along the centre line to the same angle as your panel join.
3. Cut the length as required and then powder coat the folded aluminium strips the same colour as the panels – usually Pearl White.
4. Using construction adhesive such as Fixtech attach one length of folded aluminium to the inside skins and one length to the outside skins. Tape or prop to hold in place overnight – no need for screws etc but ensure the adhesive has good coverage and forms a watertight seal on the outside. Finally wipe excess glue off with white spirit – no need for sealant.
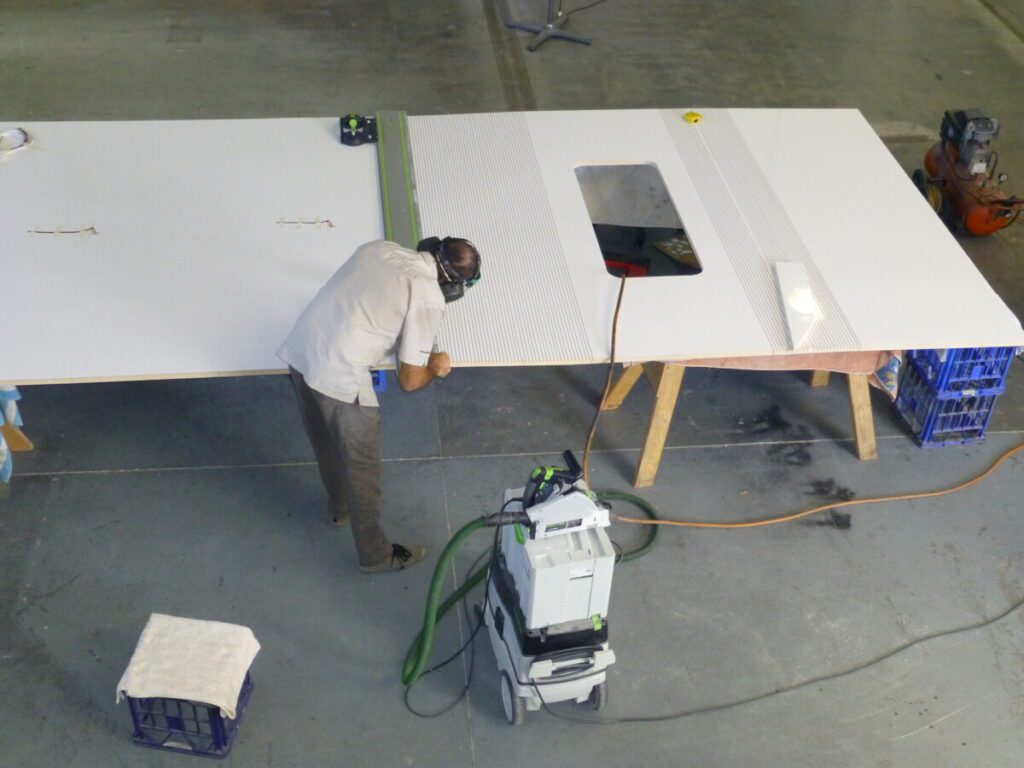
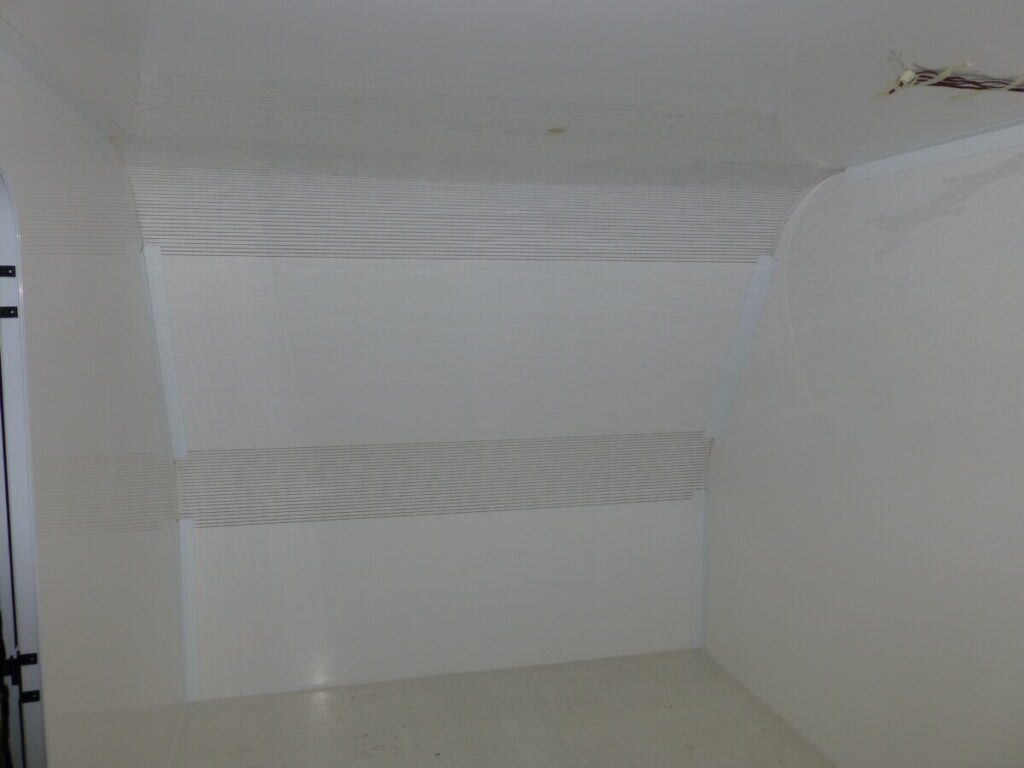
How do I cut the kerfing slots for rolling the panel round a radius?
Some customers choose to cut the kerfing slots on the inside of the roof panel when they get it home to avoid the risk of damaging this largest panel in transit and handling. The following steps are a guide how to do this.
- Mark the area of the panel on the inside skin where the slots are to be cut. The panel will clearly need to be upside down for this process. It is a good idea to mark this area say 20-30mm past the edge of the radius section to allow the roof panel to ‘bed in’ well on the sidewall panels when you lower it down.
- The ideal saw to use is one with a guide and a vacuum facility – see image below. Appropriate PPE will also need to be worn. The blade should be a good quality aluminium blade with a width of approx 3mm.
- As a guide we would only cut the slots to a depth of 50-60% of the panel thickness. This leaves a good depth of the core intact to support the external skin. So for a 29mm panel try a depth of 15-17mm for a start.
- Always do a test on a waste section of panel first before cutting the roof panel.
- The spacing between your cuts will depend on the radius to which you intend to roll the roof. Again as a guide rolling a 500mm radius would work out approx 12-15mm between slots. A trial on a waste panel strip will confirm what the slot spacing will be – the goal is that the inside skin does not quite touch the adjacent cut strip. A tighter radius will require the slots to be closer together.
Once the slots have been cut you will need to be careful how you rotate the panel and handle it prior to lowering it on to the sidewalls. Try to keep the panel straight at all times (perhaps with a team of 6 people and some timber supports) and do not let the external skin bend the wrong way as this may cause damage to the external skin.
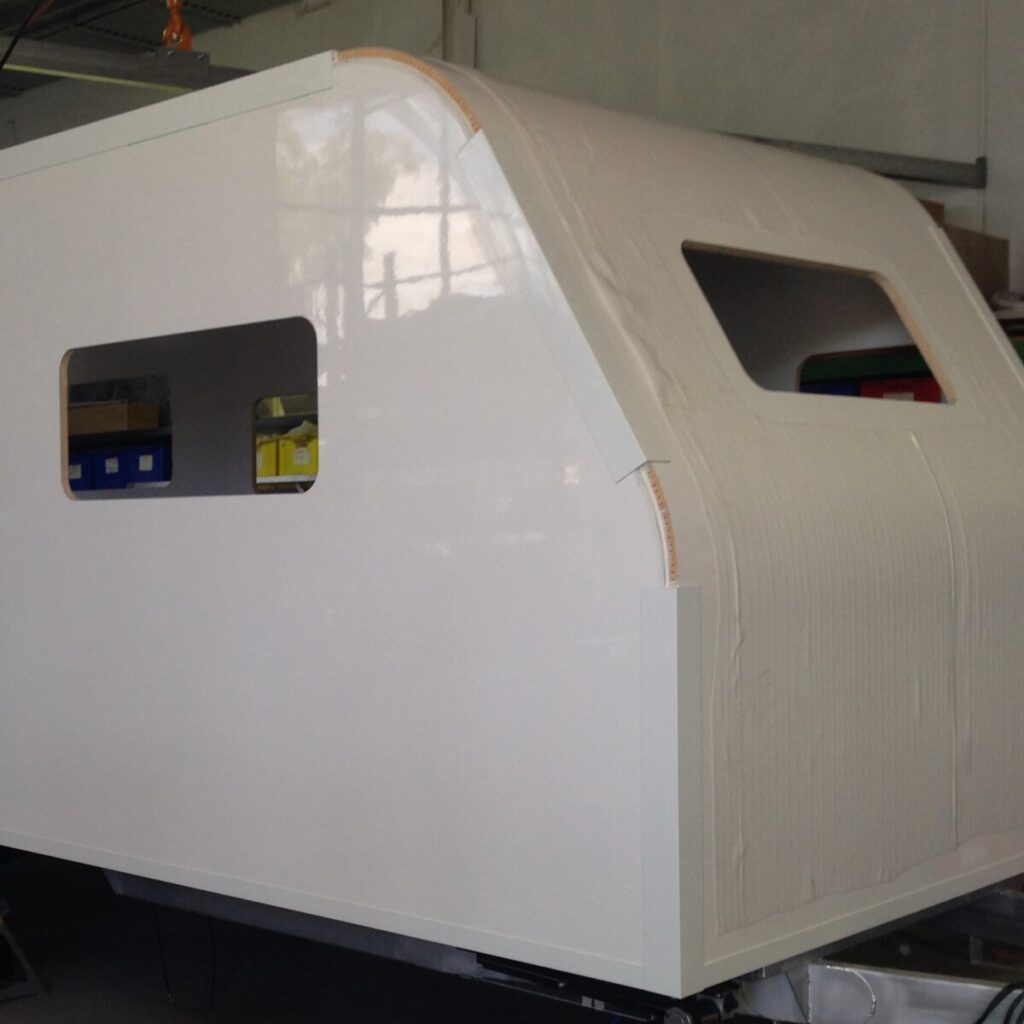
How tight can I roll a composite panel to create a curve?
Rolling a composite panel needs to be done with care to avoid the external skin being damaged. If it is rolled too tight fractures will appear in the external gel-coat layer.
Once the inside skin has been cut, take extreme care handling the panel to avoid damage to the external skin. For this reason we recommend customers cut the slots just before the panel is installed at home to minimise handling – see blog above this. If you get the kerfing – cutting the slots – done at the Manufacturer’s works consider strapping the panel to another panel to keep it straight.
How tight you roll the panel depends on which skins have been used in the composite panel. Always do a test by rolling a cut-out such as the window or entrance door and see at what point the external skin cracks.
As a guide- with 1.6 mm skins some customers roll the roof panel around a radius of 300mm. We would not recommend any tighter than this. For 2.0 mm skins customers have successfully rolled 400mm radius and for hand-laid skins (Panel Kit A) we recommend no tighter than 500 mm radius.
How do I cut the Composite Panel?
Composite panels can be cut using a jig saw or circular saw with a fine aluminium blade – ideally with a vacuum facility. Take care not to damage the gel coat finish.
All appropriate personal safety equipment should be worn when working with composite panels.
Do I need to prepare the panel before applying adhesive?
All surfaces to be applied with construction adhesive should be sanded or ground first to ensure a proper bond. And wiped clean to remove the dust.
Consult the adhesive’s Technical Sheet and always do a test sample first – you should not be able to pull the items apart.