Preparation and application of adhesive
DIY recommends using a specialist structural adhesive for attaching the structural components of your shell. In our experience this is akin to ‘welding’ the parts together and means we only get one chance! Note the adhesive will only be as strong as the surface it is applied to. Mill finish or powder coated aluminium, galvanised steel etc is fine but a poorly painted, partly rusting steel chassis would need preparing before using the adhesive.
Following these steps will make life easier for you:
DIY Tip – Always do a test sample with adhesive first, so you can see how to apply it, how long it takes to skin, how to remove the excess and the final finish you can expect.
 Select the correct adhesive – as well as the strength characteristics the skin formation time is important. DIY recommends Fixtech MSP190 for the installation of panels because you need more time and MSP 190 gives you more time. Read the adhesive data sheet before you start.
Click here for info on DIY range of structural adhesives
- Extend your drying time by putting the adhesive in the fridge – for between 3 and 12 hours – especially in the Australian summer. We do not recommend you store the adhesive in the fridge since the temperature of 3 degrees is outside the recommended temperature for adhesive storage
- Apply adhesive first thing in the morning – avoid the heat of the day.
- Before applying adhesive always do a DRY FIT. For composite panels and joiners this includes cutting the panel and panel joiners, taping the panel joiners in place, then lifting the wall onto the chassis and ensuring the wall fits the chassis correctly. If not, remove it, trim again and retry.
 Have your cleaning materials (rags and cleaning fluid – DIY uses white spirits) to hand before you start. Carefully use a plastic scraper to take off the excess adhesive. Do not let it dry out.
- Have all your clamps and timbers ready before you start to install a panel.
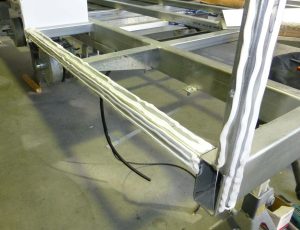
- On the chassis apply continuous beads of adhesive sufficient to give a final adhesive depth of 1-2 mm when finally clamped in place. See image above.
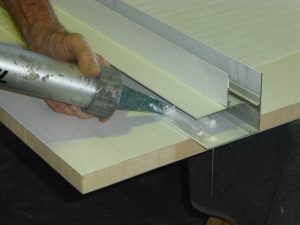
 In the panel joiners apply 2-3 continuous beads adjacent to the ‘nibs’ such that the adhesive is spread evenly when the panel is pushed into the joiner. See example image above. For important ‘structural’ joins DIY recommends the adhesive should be ‘just oozing out’ along the length when it is clamped in place. Avoiding excessive adhesive saves cleaning up.
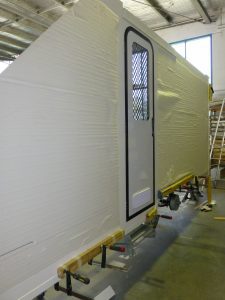
- Clamp items together firmly using G-clamps and timber lengths to spread the load along the length of the join. Do not over tighten clamps as this will push adhesive out and reduce strength of join. See the example we’ve provided.
Preparation of a Composite Panel for Installation
DIY Tip – Dry fit all panel joiners to panels AND the composite panel to chassis prior to application of adhesive.
At this stage we have already prepared the chassis ready for the installation of panels.
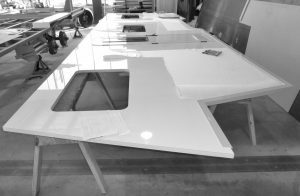 Preparing a panel includes the following steps:
- Lay the panel on 4-6 tressles (or other supports) so you can work on it easily.
- Identify the A side and set the panel so the A side will be the exterior of the van.
- With your drawings and/or chassis dimensions available, trim the panel (as required) to make sure it will fit the chassis when the panel joiners are in place.
- Cut the panel joiners and with masking tape secure them temporarily to the panel in the appropriate places
- Lift the panel in place on the chassis and check clearances are within 1-2 mm if possible. Once you are happy lay the panel back on the tressles DIY Tip – An 8m panel will weigh approx 90kgs – use tressles or crates as steps when lifting your panel up to the chassis. Always lift one end at a time with 2 men, the third person holding the panel vertical at the other end.
- Mark the panel joiner locations on the panel and then ‘roughen up’ with sand paper the areas of gel coat that will be inside the panel joiners. This will improve adhesion to the gel coat layer. Take care not to scratch the gel coat that will be visible.
- Once complete thoroughly clean the panel joiners and panels where adhesive is to be applied and you are ready to go! Adhesive will not stick well to dust.


 Select the correct adhesive – as well as the strength characteristics the skin formation time is important. DIY recommends
 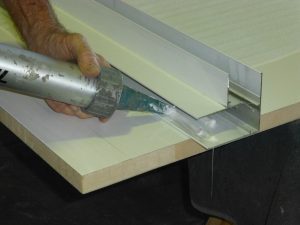 Have your cleaning materials (rags and cleaning fluid – DIY uses white spirits) to hand before you start. Carefully use a plastic scraper to take off the excess adhesive. Do not let it dry out.
 In the