

Firstly a few words about design –
- At DIY Caravans we recommend you invest well in the design of the project in every detail before you press the ‘go’ button. A well designed project will meet or exceed your expectations.
- Ideally the ‘designer’ will be the same person or work very closely with the person who builds the project so all those ‘ideas’ get incorporated into the project
- Design brings together all aspects of the build – is not just about what it looks like but includes every detail such as how easy it is to run the 12v wires, how strong the panels are joined together and how user-friendly is the internal area?
So in order to design you Panel Kit, you will most likely have made the following decisions
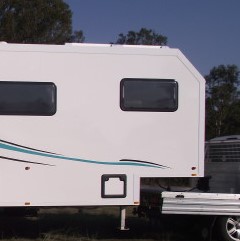
- Overall dimensions and shape of your project
- Internal floor-plan and layout
- Which method you intend to use to join the panels together and attach them to the chassis/frame. Click here for more info You need this info so you can calculate the exact dimension of each panel.
- Which Panel Kit (A, B or C) most suits your needs – the choice of panel insertions and options varies with each Panel Kit A, B or C.
We are now considering the design of the composite panel kit only – in fact each panel will have a unique design that makes it ideal for its purpose and at DIY Caravans every panel is made to order to your design.
For each Panel your design and Panel Drawing will need to include the following:
- Size
- Shape
- Panel Insertions
- Profile cutting
- Gel Coat skin options
- Floor panels
We will now discuss each of these in turn.
1. Size of Panel
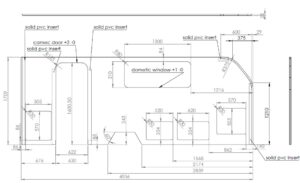
Essentially we need to know the max length and max width of each panel in mm. Panels start life as a rectangle and these dimensions will determine how much skin and core are required in production.
2. Shape of Panel
Panels can be cut in almost any shape. The cnc machine needs to be programmed to cut the very shape you require so we will need all dimensions and angles etc
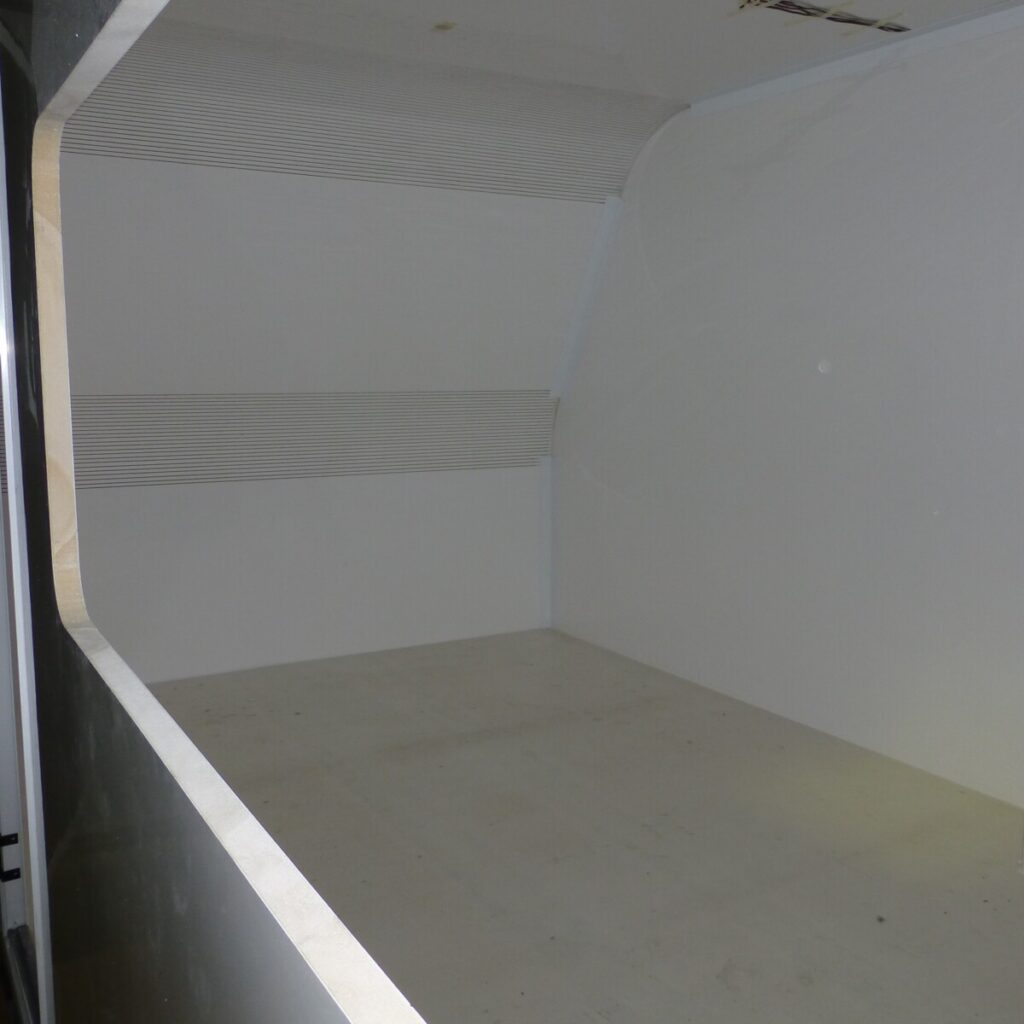
Example 1 – For projects with a rolled roof (such that the roof panel comes all the way down to the bottom of the front wall) we need to know where to ‘kerf’ (cut slots) in the inside skin of the roof panel. We also need to cut a radius section in each of the side wall profiles so we need to know the radius of the curved section and precisely where it starts and finishes.
Example 2 – for projects with an angular front wall section or a ‘rake’ at the rear – the design of the sidewall panels need to specify the angle shape and dimensions.
3. Panel Insertions
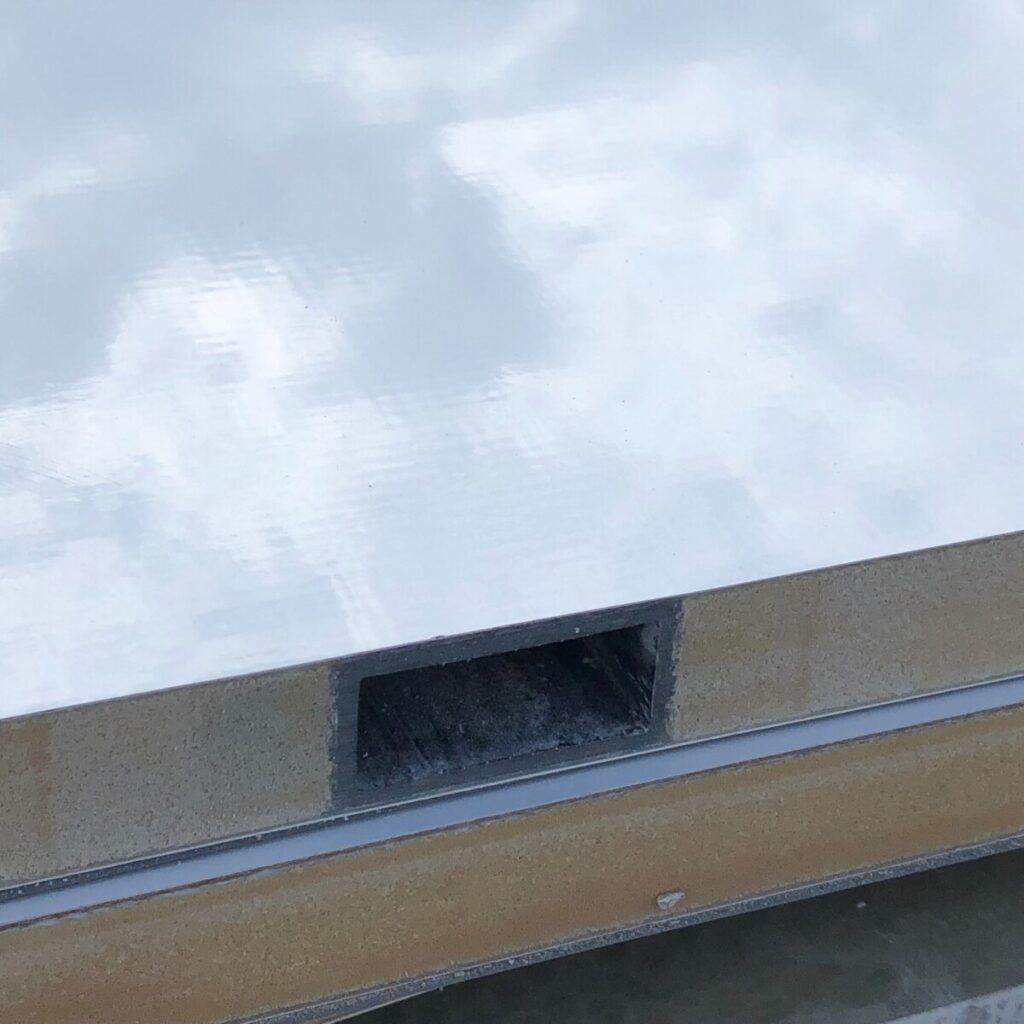
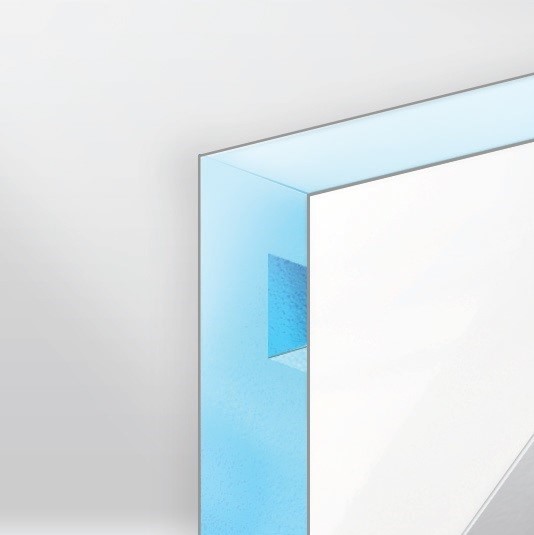
Panel insertions are materials that are ‘placed’ within the panel usually for the purpose of adding strength, providing screw purchase or running cables.
Generally Panel Insertions run from one edge of a panel to the opposite edge – so you can see precisely where they are when you receive the panels.
Each panel kit type has a specific range of Panel Insertions to choose from – so choosing which Panel Kit (A, B or C) best suits you is necessary before you design your composite panel kit.
Please click on the links below to see the details of Panel Kits A, B or C – and also take note of the Panel Insertions available with each kit which are listed at the bottom of each product page.
Consider for each composite panel –
a. Is any additional strength required in certain places?
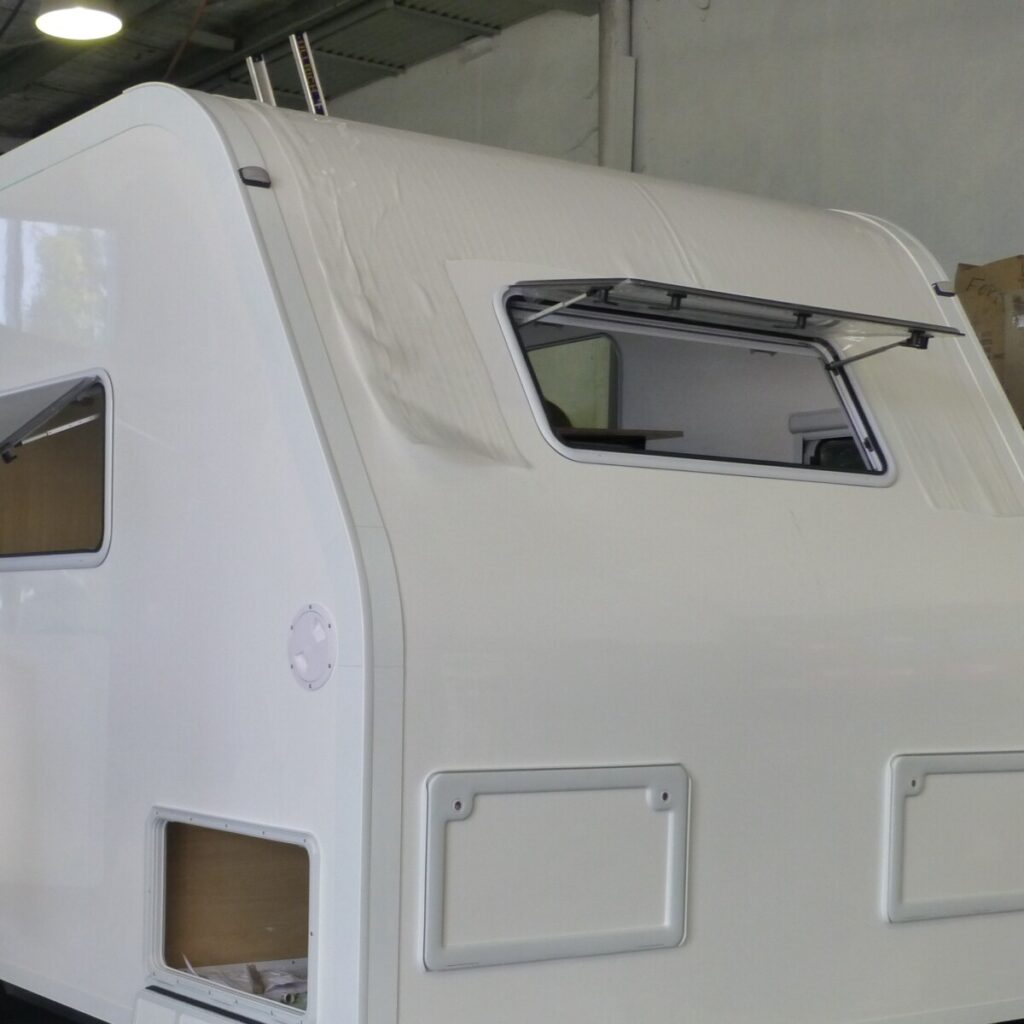
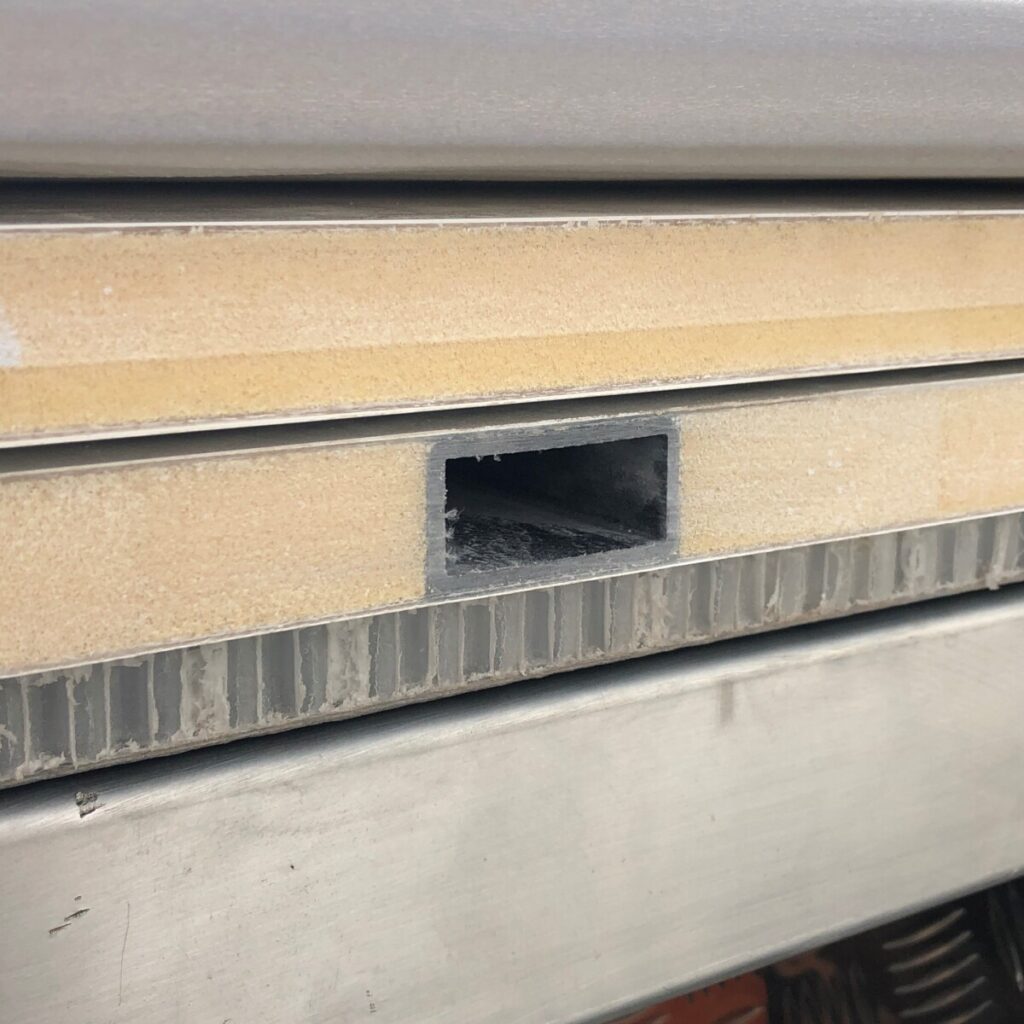
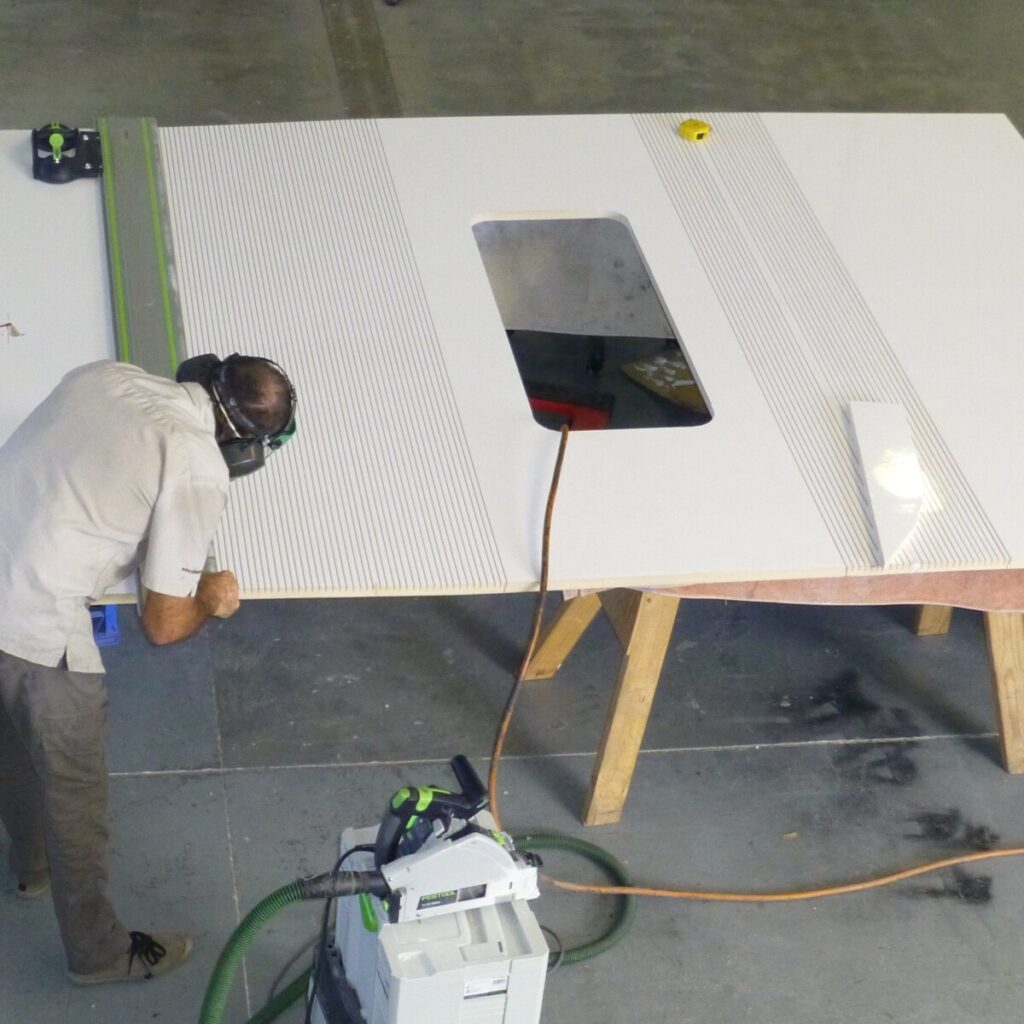
Example1 – for an AC unit to be mounted on the roof panel we would recommend you install a pultrusion such as this one each side of the AC hole – which adds strength to carry the 40-50kg unit and provides a conduit for the 240 volt cable
DIY Tip – AC ‘holes’ are usually 360×360 or 400x400mm. Add 5mm to the ‘gap’ between the pultrusions to make sure the cnc cutter doesn’t touch them
Example 2 – Installing an entrance door in a panel – consider installing a strip of hi-density pvc Insertion or similiar each side of the door ‘aperture’. When installing the door you can then glue and screw it in place and it’s much stronger when it’s blowing in the wind
Example 3 – Installing cabinetry or other items to the inside skin – make sure Hi-density pvc insertions are located where you need some screw purchase
b. Do you need to run wires to a point near the middle of the panel. Inserting a Panel insertion – conduit such as this one will allow you to feed the wires easily
DIY Tip – If you only need to feed the wires 100-200mm through the core – this can easily be done with a blunt drill bit from the edge and avoid the need for a conduit
c. Are you removing strength from the panel but cutting a large hole close to the edge (within 200mm) of the panel? This may be a window, locker door or entrance door and you may want to consider an insertion to re-instate the strength and integrity of the panel.
4. Profile Cutting
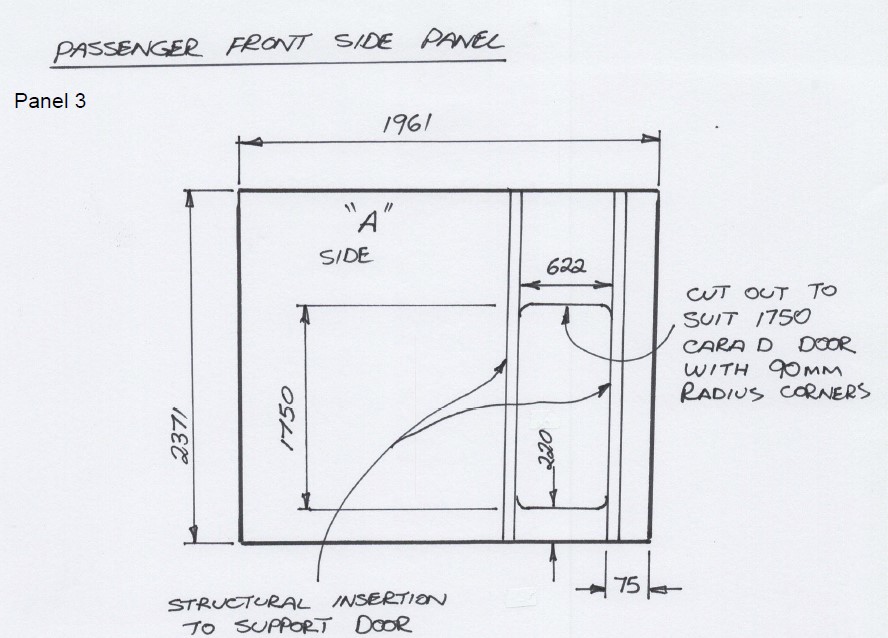
All DIY composite panels include the cutting of the panel perimeter in the cost. However you may want cnc cutting to take place for doors and windows or locker doors etc. In these cases the cut-out will normally be left in place with ‘tags’ to mantain the panel integrity for transport. As well as the size of the cut-out we will need its exact location in the panel and any radius details.
Example 1- Note in the drawing below for the door aperture we can see the dimensions and the radius of the 4 corners, the insertions each side and also precisely where it is located in the panel.
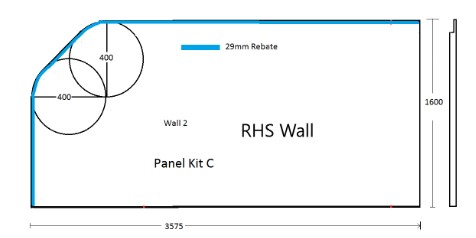
Example 2 – Profile cutting also includes the cutting of a rebate around the edge of a panel to fit another panel into. The dimensions of the rebate will need to be specified and depend on which method you are using to join the panels together click on the link for more details.
Example 3 – Profile cutting also includes ‘kerfing’ for a rolled roof panel – this is where we cut slots in the inside skin to let the roof roll down. Using the outside dimensions of the sidewall you will be able to calculate where the slots in the roof panel start and finish.
5. Gel Coat skin Options
The standard skin with all DIY Panel kits is Gloss White in finish and the skin thickness will depend on the Panel kit chosen.
If you require coloured skins or a have a preference for a particular skin thickness please click on these links for the options and specify your choice in your summary table and on the panel drawing.
6. Floor Panels
Many customers include a one-piece floor panel in the Panel Kit Summary table and there are a range of different floor products available (see images below). Ideally we like to supply the floor panel from the same location (or even same supplier) so all the panels can be collected together or it may be necessary to use different suppliers.
It is imperative that the floor panel is suitable for its purpose bearing in mind your largest cross member spacing and the type of load it is to support – eg pedestrian, motorbikes etc. DIY Caravans recommends using a thicker floor product than standard to prevent any issues later on.
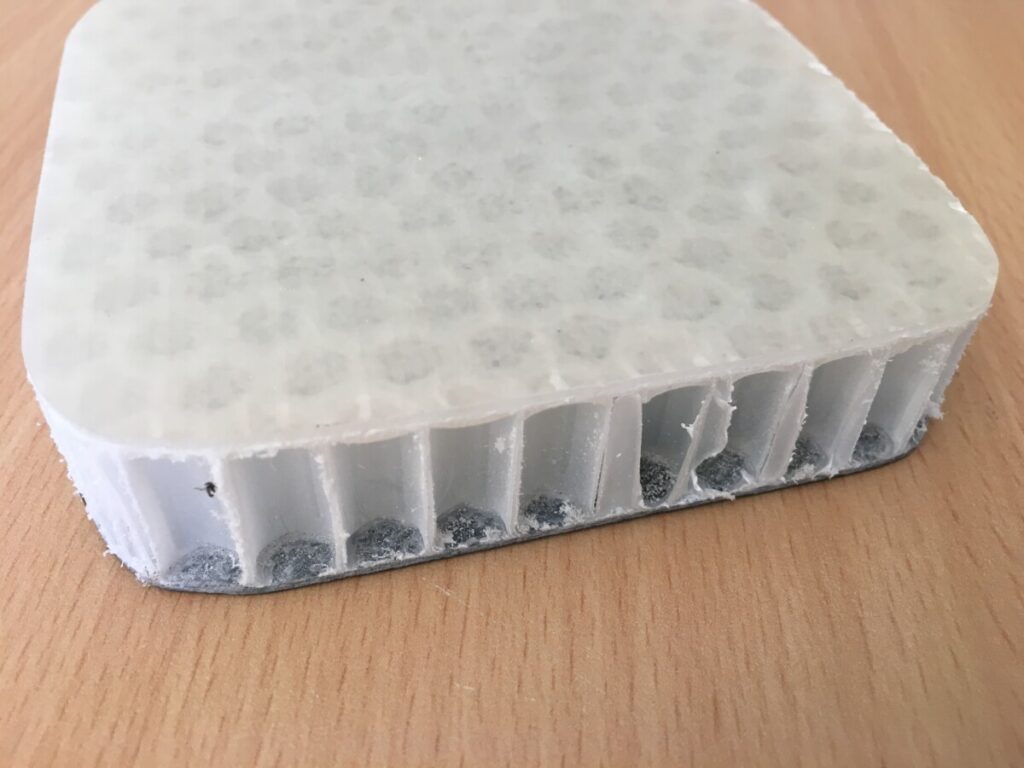
Honeycomb Floor A 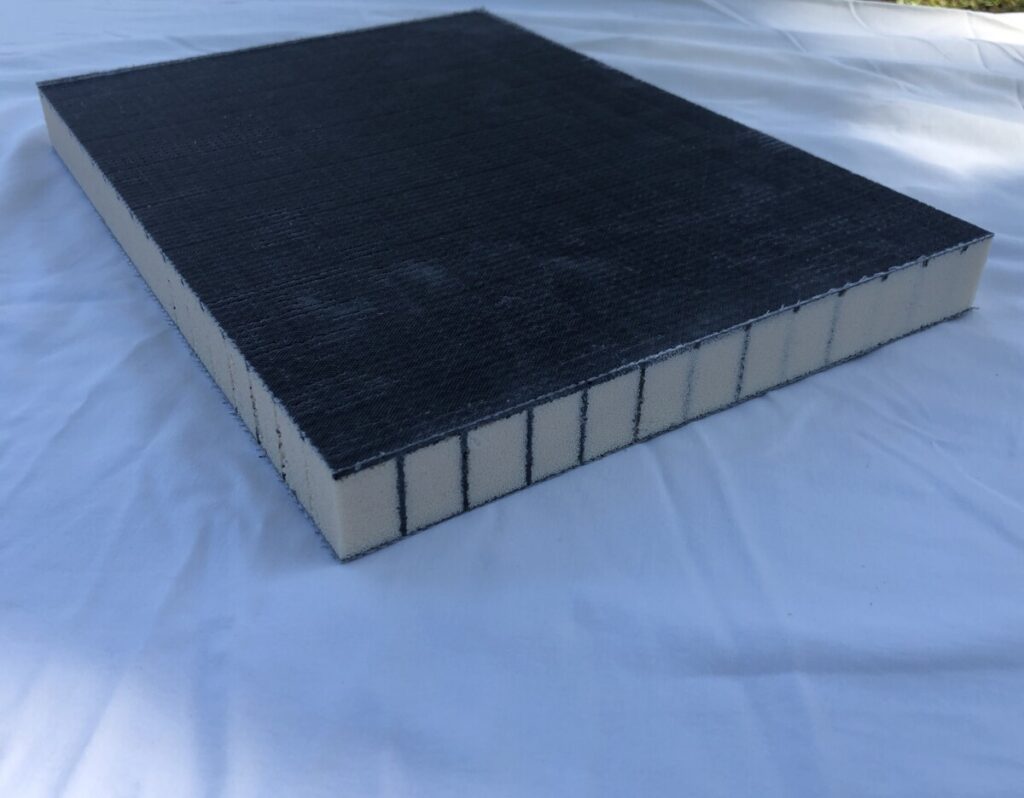
Infused Floor C 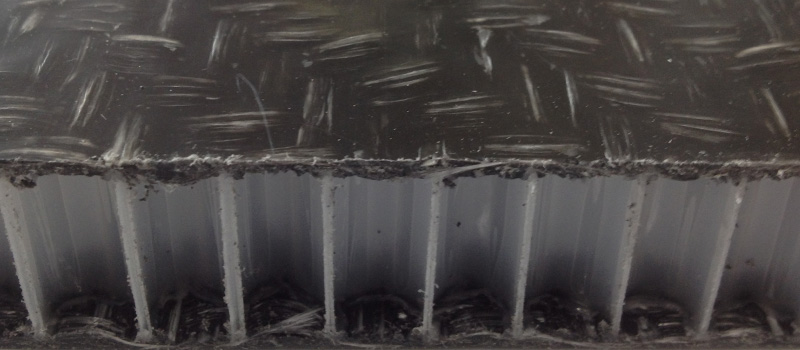
Floor B
Now we have all the details of the design worked out and a drawing completed for each panel the next step is to request a quote for My Composite Panel Kit . Click on this link to see how to do this and the team at DIY Caravans will get back to you with any queries.